|
Before taking this class, I would have considered myself an amateur photographer who had a very brief understanding of cameras and a few techniques of shooting. I would take pictures with no regard to the lighting and framing of the subjects in the frame. The only real technique I knew was the rule of thirds but I did not even follow that all the time. I mostly shot pictures of my friends and I, but didn't really pay attention to lighting and shadows and how that affected the quality of the pictures I took. I did not know how to set the correct aperture or shutter speed to get the right exposure for my picture. In the beginning of the class I struggled to find the right exposures so I relied heavily on the auto setting of the camera. The pictures in the slideshow show some of my worst and best work throughout the trimester. At the end of the trimester, I reflect on the progress I have made as a photographer. I have learned how to better frame my images and create better exposures with different lighting and shadows. I have a much deeper understanding of the elements and techniques that are used when shooting a single picture. In addition to my shooting skills, I have become much more adept at using photoshop to further enhance pictures and create artistic edits with pictures and different techniques. I enjoyed creating the photoshop assignments and turning ordinary pictures into something unique with the photoshop tools. Overall I enjoyed learning about photography skills and will definitely be applying my knowledge to my photography in the future.
0 Comments
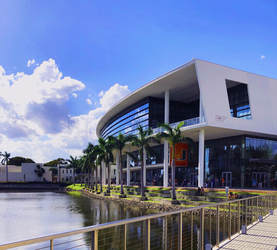
This weekend I travelled to Miami, Florida to visit the University of Miami. While I was touring the campus, I captured some of my favorite parts of their beautiful and sunny campus. I used these pictures for the landscape category because I really loved the landscape and nature of the campus. I learned that lighting and framing were very important to developing aesthetically pleasing pictures of a landscape.
Aperture: 8.0 Shutter Speed: 1/320 ISO: 100
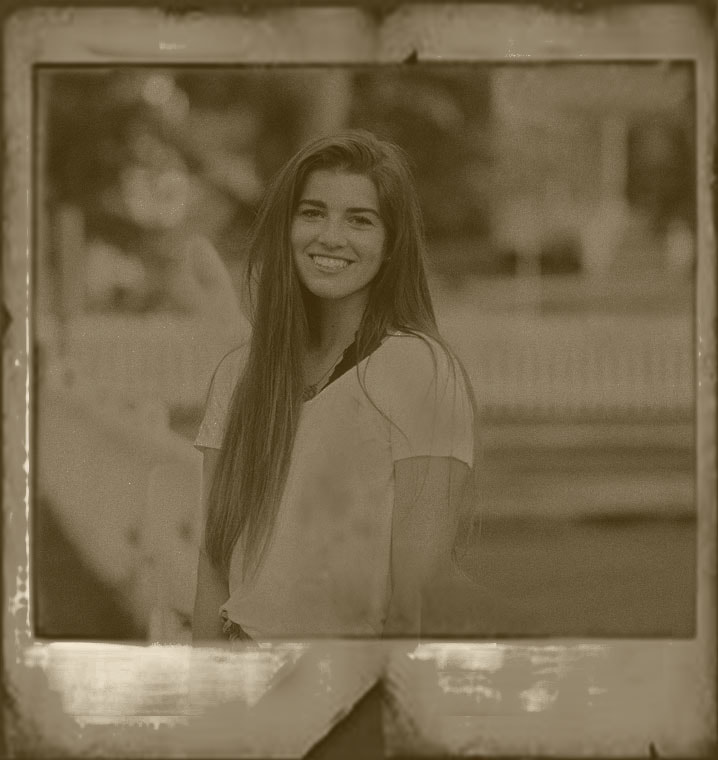
For this tutorial I turned one of my senior pictures into a vintage looking picture with a different frame and filter. I changed the tones of the picture to make it seem more vintage and also added blur and grain. The tutorial I used was from: https://www.creativebloq.com/how-to/age-a-photograph-in-photoshop-cc
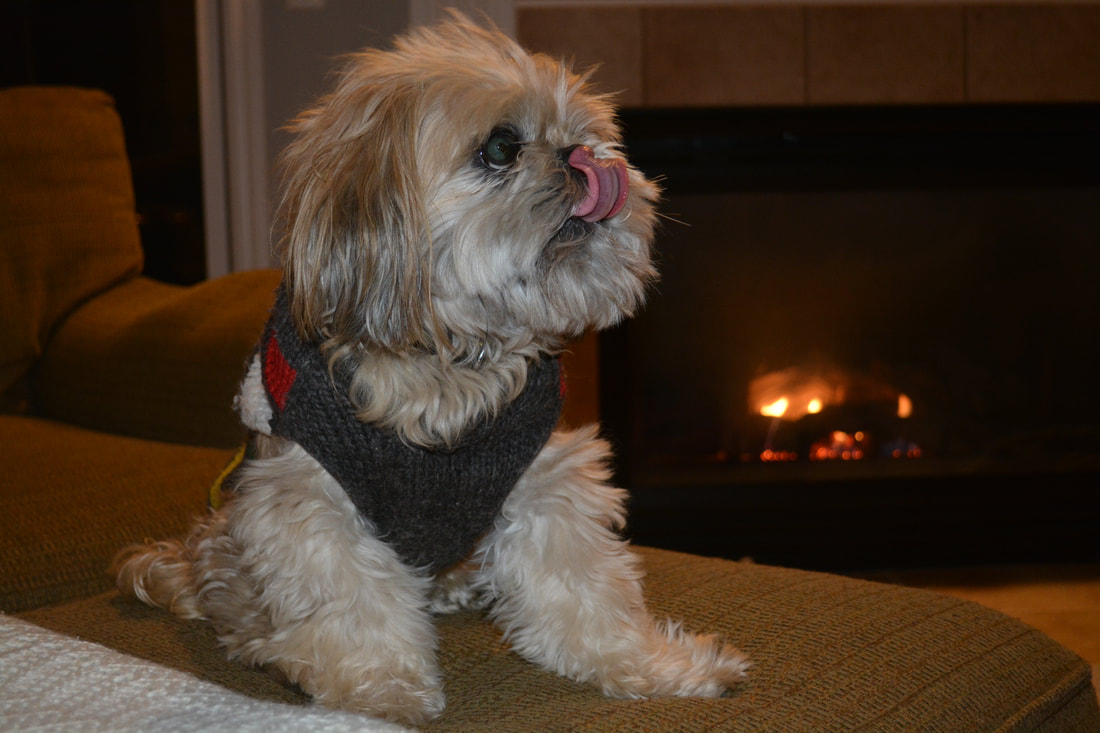
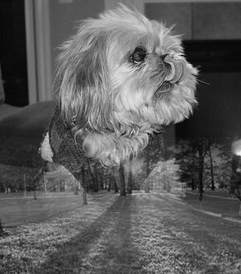
In ti=his photo, I used a picture I had previously taken of my dog and combined it with a picture of grass. To do this I used a gradient map to blend the two pictures together into one seamless picture. I learned how to use a gradient map as well as desaturating the picture to blend the two pictures together. I found this tutorial on: https://www.photoshopessentials.com/photo-effects/photo-blend/
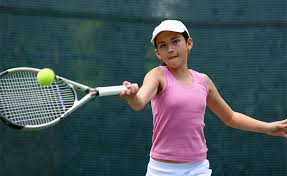
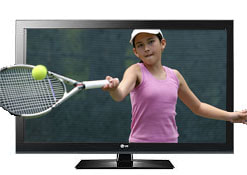
For this tutorial, I took an average picture of a girl playing tennis and added a TV screen and created a 3D effect of her playing tennis off the screen. I learned how to select parts of a picture and put them above an image to layer them and create this 3D effect. I found this tutorial on: http://www.photoshopessentials.com/photo-effects/screen-jump/
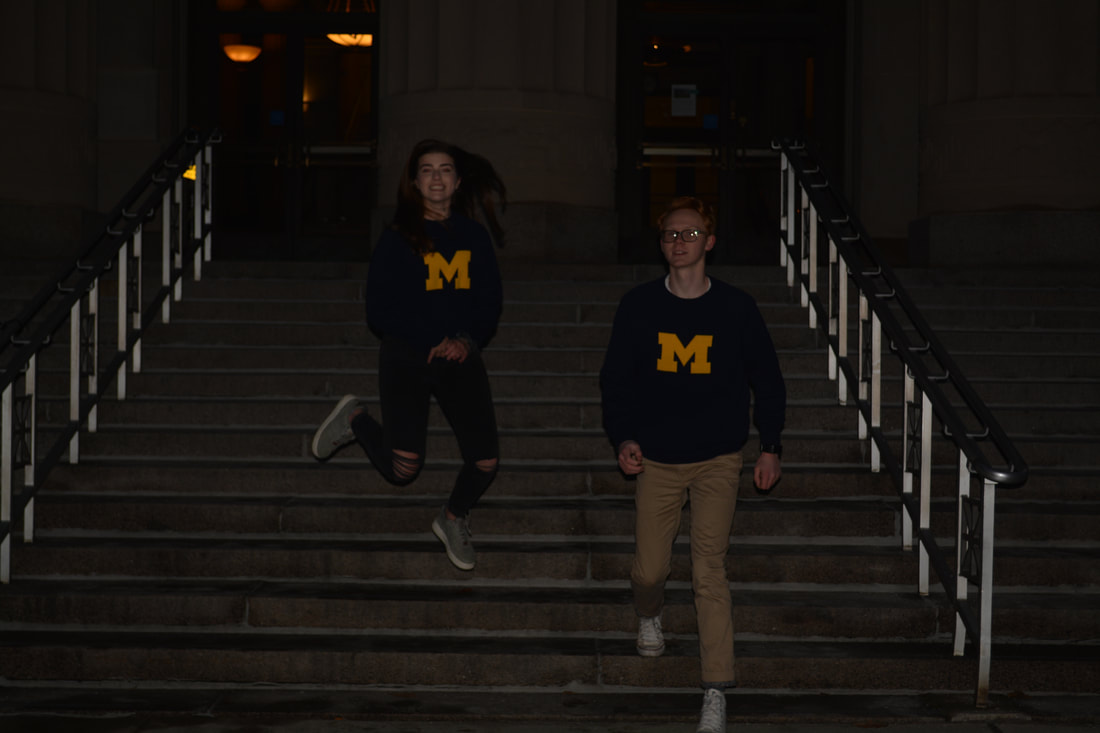
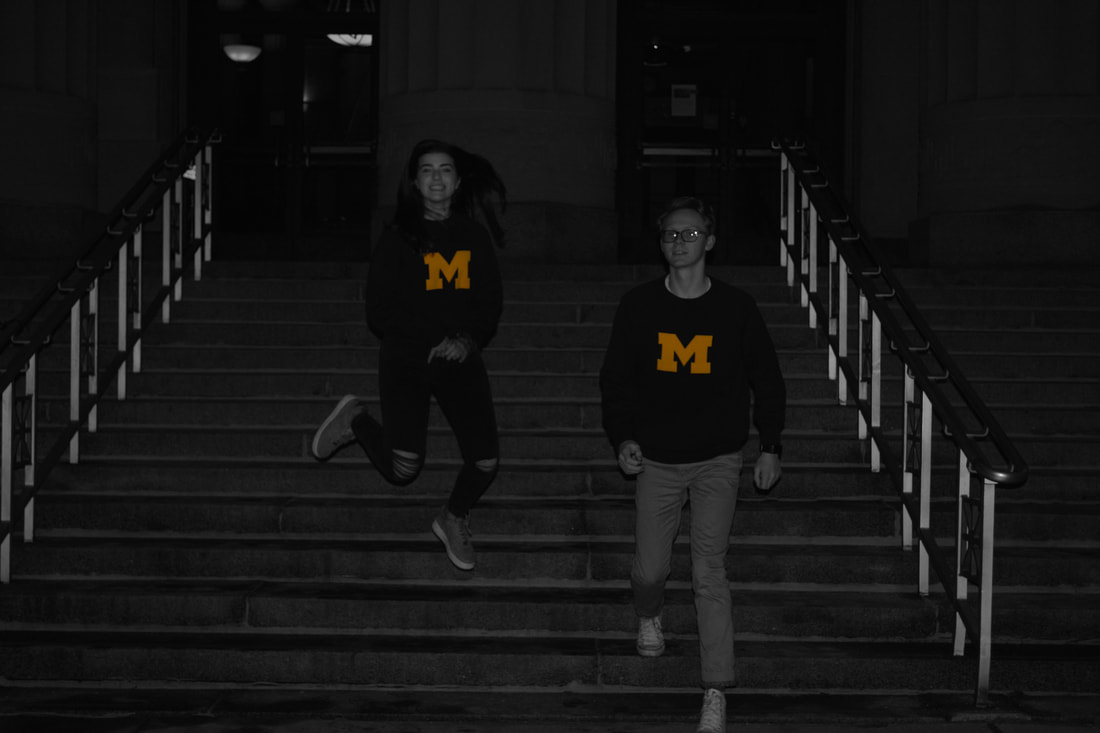
For the dash of color tutorial, I wanted to highlight the maize color of the block M on our sweaters so I chose this picture of my friend and I. I learned how to use the art history brush to get the exact color of an element and expose its color. I can use this tool in the future to highlight the color of an element of a picture.
http://www.digital-photography-school.com/mono-with-a-dash-of-colour-photoshop-cs2-tutorial 1 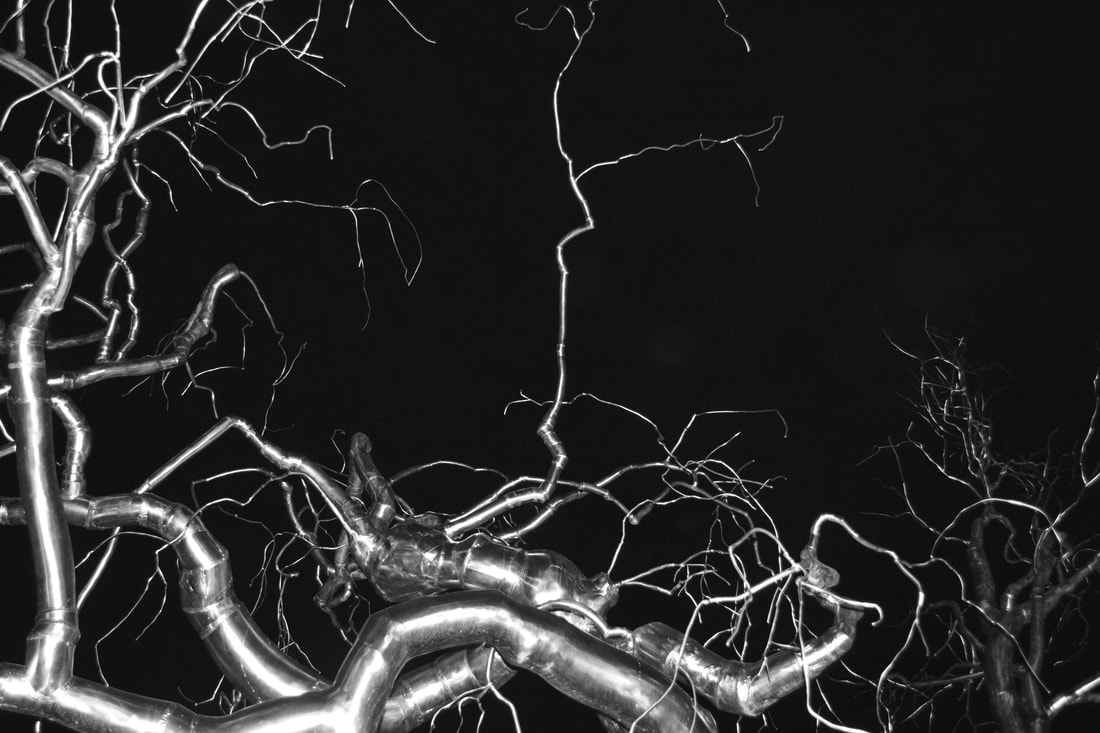 Aperture: 4.5 Shutter Speed:1/60 ISO: 3200 For this shooting assignment, I choose to shoot Macro because I found this cool metallic tree sculpture when I was in the Detroit area this weekend and I thought it looked cool up close. I like how the silver is very bright against the pure black background and I think the shape of the branches make it a very interesting picture to shoot up close. I learned how to frame the image to get the most interesting part of the subject.
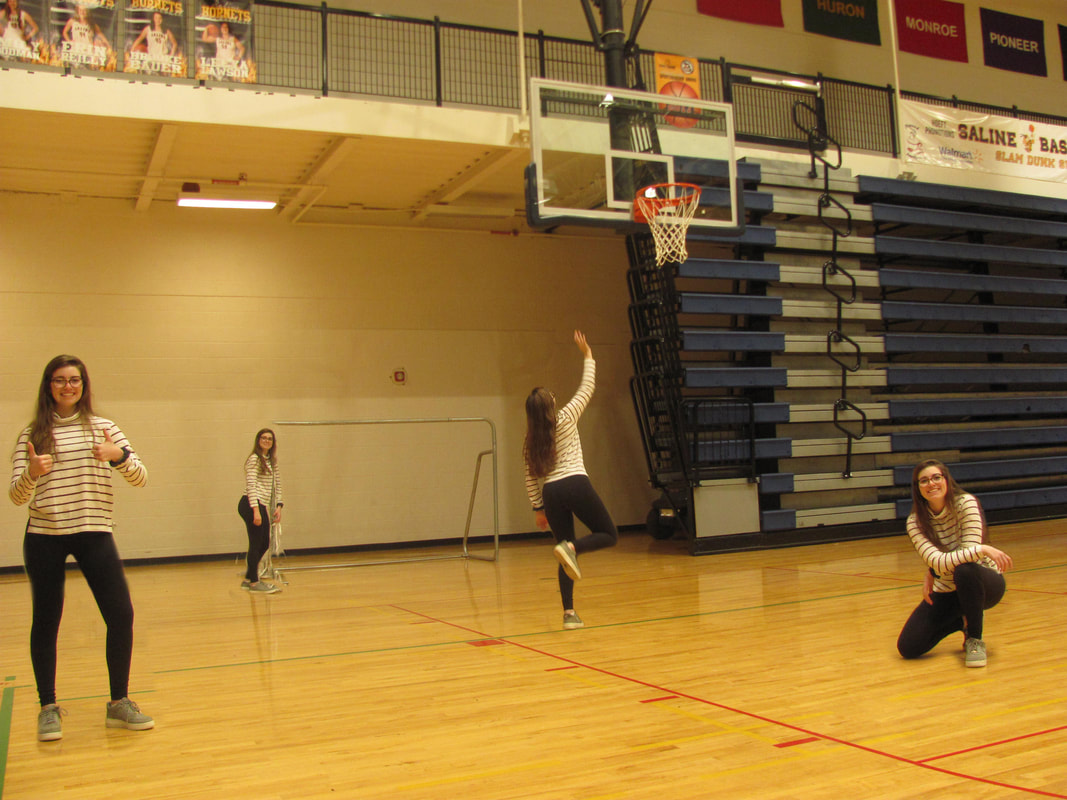
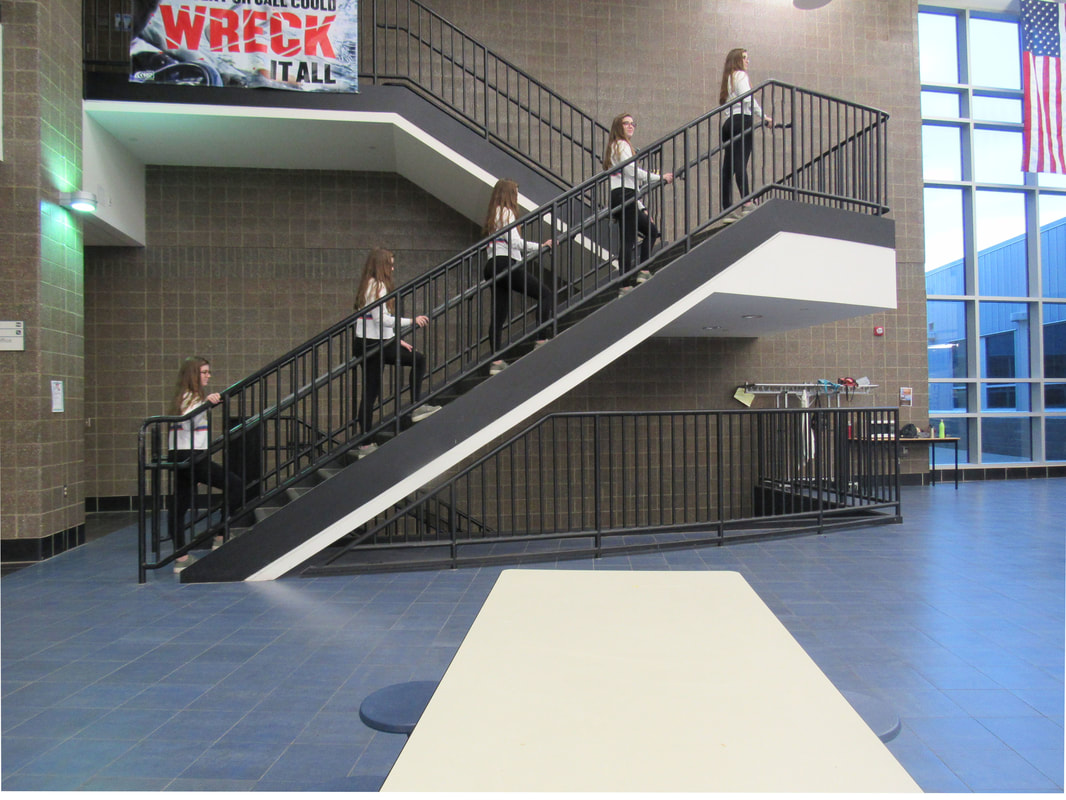
For this week's photoshop assignment, I learned how to use layers and the lasso tool to combine multiple pictures into one. I think these pictures are cool because at first glance they look almost impossible to make but it was actually really easy. It was fun to explore the possibilities of this assignment and what images we could create. If I were to do it again, I would do more interesting poses and maybe try to have myself interacting with my other selves.
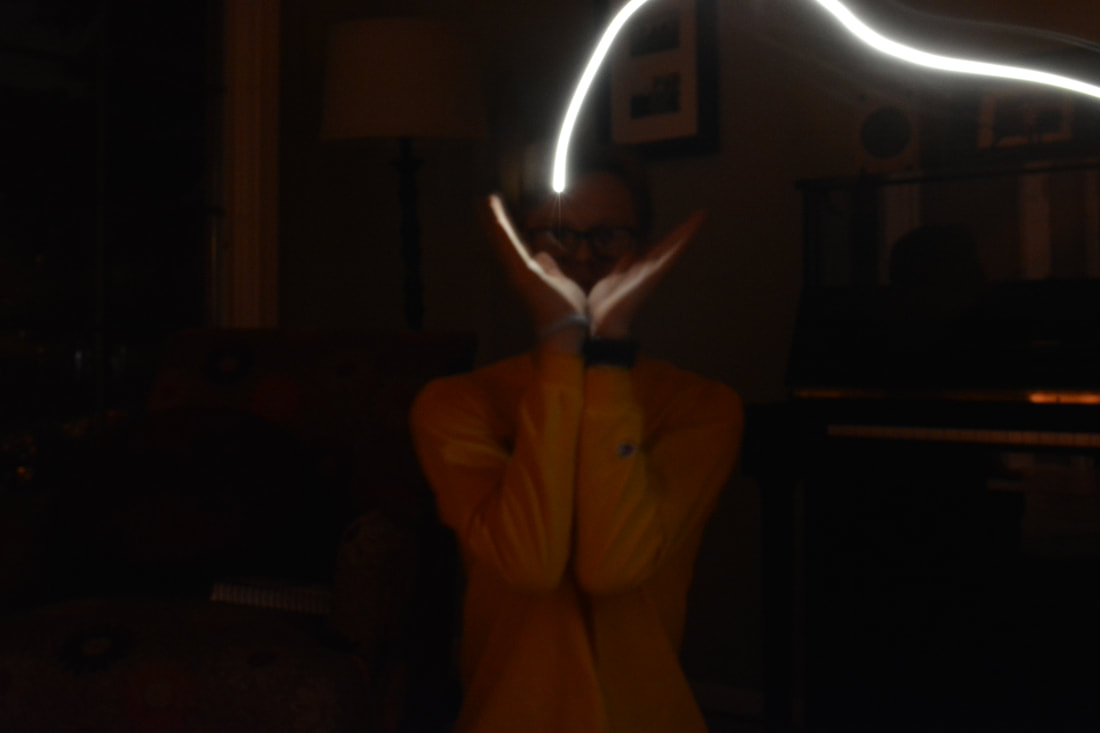
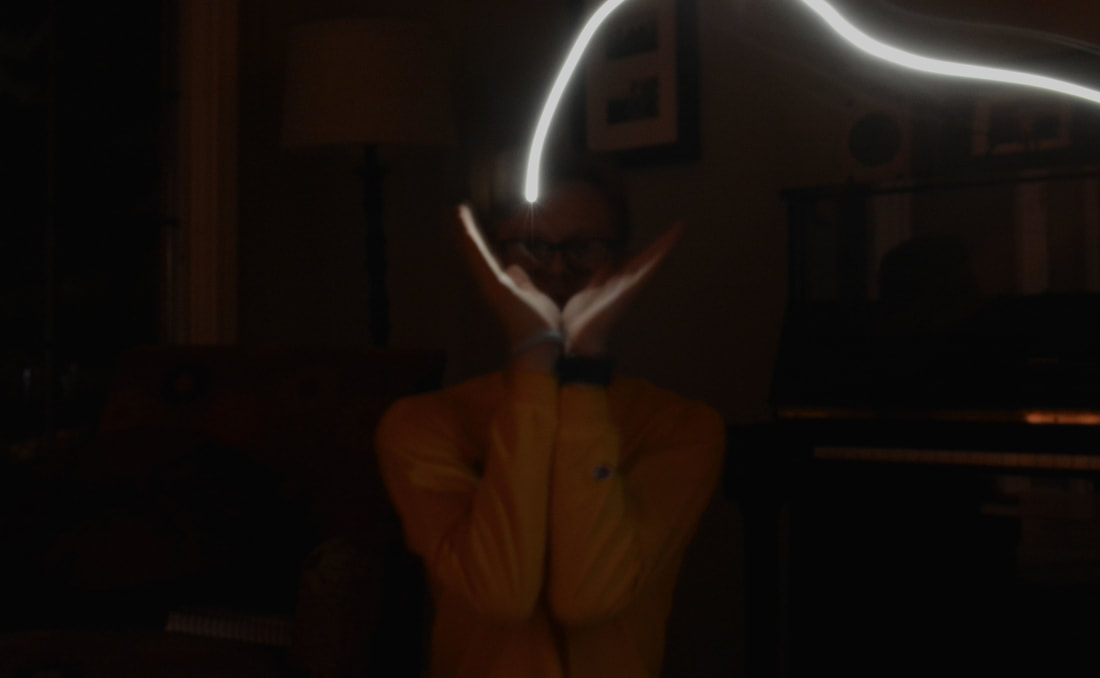
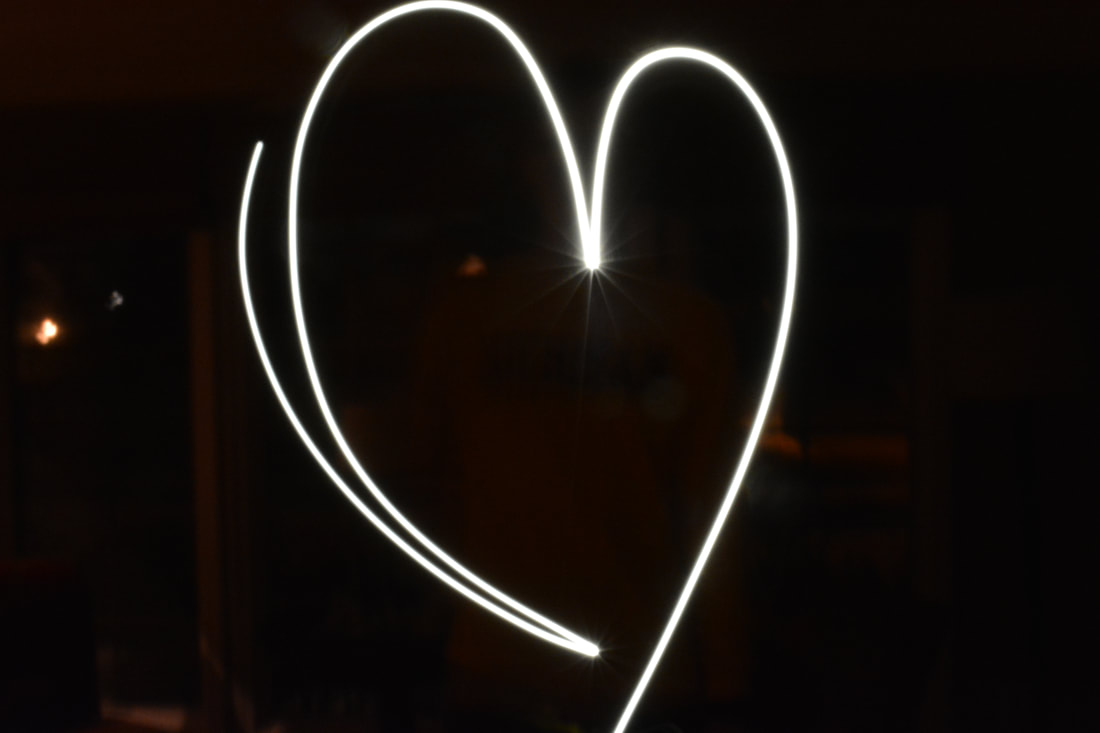
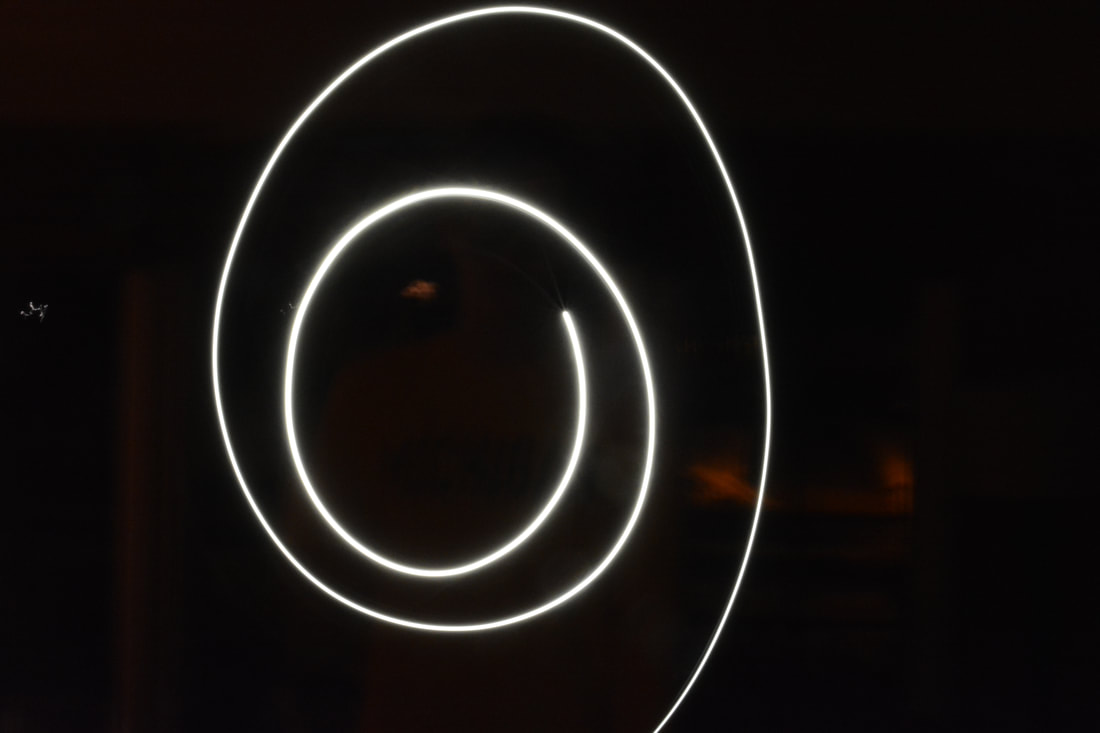
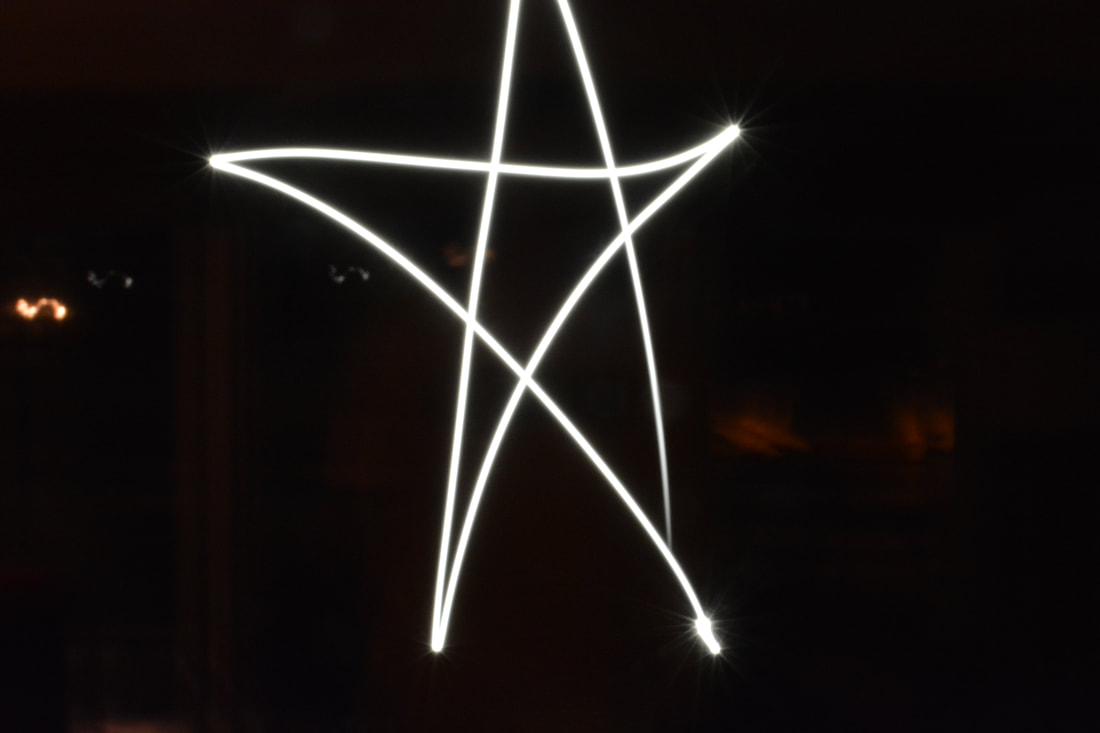
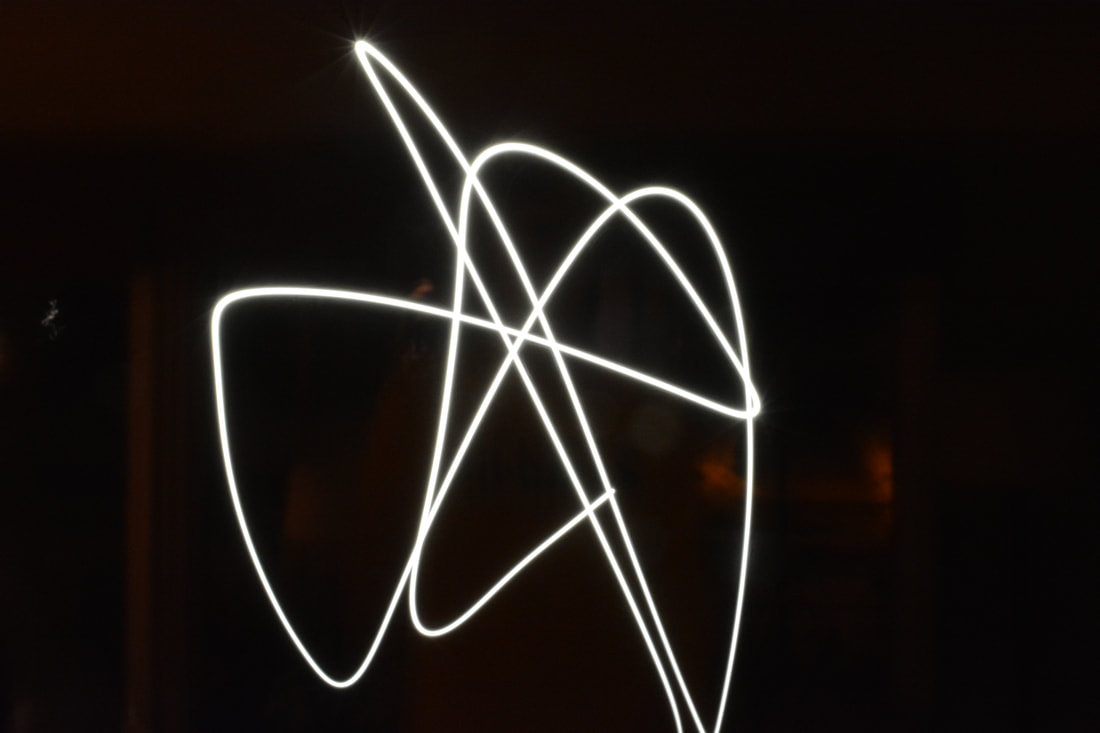
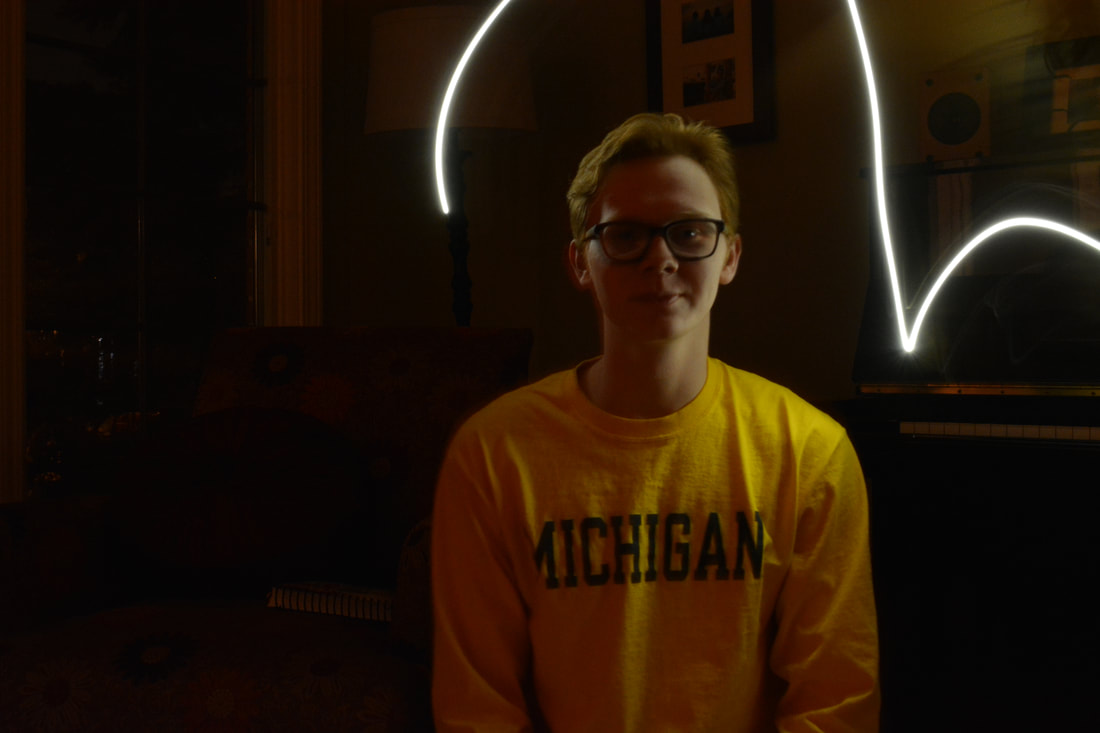
This week I attempted to do light painting, I wanted to have the light be centered around my friend's hand but still have the subject in focus. I was able to capture a pretty clear light stream but the subject and background was fairly dark. Also the light stream was partially cut off so I wish I could've focused it more in frame. I had fun creating shapes with the light but I had trouble keeping the subject in the frame when I made these shapes.  For this assignment I chose a theme of the Disney movie Cars 3, because it is one of my favorite movies and I thought editing them onto the track would be a cool idea. I attempted to make it seem like a race at a stadium with a few of the main race cars and also Lightning McQueen's pit stop guy, Guido, peeking out behind the wall. One of the biggest challenges of this assignment was getting each of the pictures to be as least pixelated as possible to improve the quality of the photo. I learned a lot about photoshop through this assignment and I hope to improve my editing skills in future assignments.
After completing the panoramic assignment, I realized that taking panoramic shots requires a lot more thought and technique than I realized. After putting them into photoshop and merging them, I noticed that most of them became very narrow and thin. I also realized that using a tripod is essential to creating a panoramic that was clear and seamless. The tripod allowed for easy adjustment of the camera and guaranteed the correct placement. I liked taking these pictures and it was cool to see them merge together in photoshop to create the panoramic.
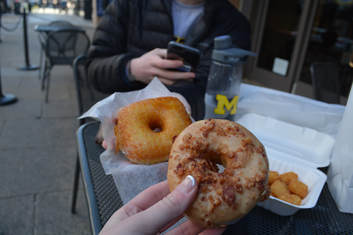
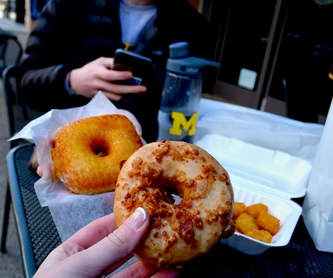
Original Aperture: 5.6 Shutter Speed: 1/160 ISO: 200 For this assignment, I shot pictures of the delicious donuts we ate at a cool donut shop in Washington D.C. The donut in my hand was a maple bacon donut and my friend's donut was a creme brulee donut. We also got tater tots which you can kind of see in the corner. I wanted to accentuate the bacon bits on top of the donut and I found that shooting with flash helped to do that. In photoshop I cropped the image to focus on the donut more and adjusted the contrast and levels to give more saturation and depth to the donut.
|
AuthorWrite something about yourself. No need to be fancy, just an overview. ArchivesCategories |
 RSS Feed
